You'll read the words "development" and "development stack" a few times in this guide. You'll also see scripts and code snippets. Don't let that scare you.
You can get your customers a great ReportBurster Portal without writing a single line of code yourself. You describe what you need to AI — in plain English — and AI hands you the code along with clear instructions on what to do with it. And to say it straight: there will be only a handful of files to touch — not tens, and certainly not hundreds.
That said, if you know how to code, or if you simply enjoy coding — nobody stops you. Write the code yourself, or write part of it and let AI handle the rest. Everything works. You decide how you want to work.
Three development stacks are available for building your Document Portal. Each achieves the same result — a secure, customizable portal for distributing documents to your users. Pick the one that fits your team and preferences.
Build Your Own Portal — It's Easier Than You Think
Building a custom document portal doesn't require months of development. ReportBurster's AI Crew walks you through the entire process — from requirements to working code:
Start with Athena — she helps you define requirements, design your data model, and create a complete Product Requirements Document (PRD) with UI mockups.
Pick your stack expert — Hermes for Grails, Apollo for Next.js, or Pythia for WordPress.
Build together — your AI partner generates most of the code from plain English requests, guiding you task by task through the implementation.
The billing portal demos show the full workflow end-to-end: Athena writes the PRD, then Hermes and Apollo each build the complete admin panel and customer-facing portal UI — same requirements, different stacks, same great result.
Grails/Groovy Stack (Recommended)
The Grails stack is the recommended choice for ReportBurster Document Portals. Why?
Consistency with ReportBurster's backend. ReportBurster already uses Groovy for scripting (publishing scripts, report processing, automation). Choosing Grails means one language across your entire stack — portal logic and ReportBurster integration speak the same tongue.
Battle-tested for CMS-like portals. Grails with GORM/Hibernate provides a mature, productive framework for building data-driven admin interfaces and self-service portals — exactly the kind of application a document portal is.
JVM ecosystem. Access to the full Java/Groovy ecosystem, Bootstrap 5, AdminLTE, and proven patterns for authentication, access control, and REST APIs.
Your AI partner: Hermes — Grails Guru & Self-Service Portal Advisor.
Hermes specializes in building admin panels, customer portals, and document management UIs with Grails — from Athena's PRD to working code, in a pair-programming session.
Next.js/React Stack
For teams who prefer a cutting-edge, modern web stack, Next.js achieves exactly the same portal results — different tools, same outcome.
Modern DX. React 19, TypeScript, Next.js 15 with App Router and Server Components, Tailwind CSS v4, shadcn/ui (Radix primitives + Lucide icons), and Drizzle ORM.
Full-stack React. Server-rendered pages for fast initial loads, client-side interactivity where it matters, and built-in API routes for seamless backend integration.
Payment integration. Native Stripe/PayPal SDK support for invoice portals and billing flows.
Your AI partner: Apollo — Next.js Guru & Modern Web Advisor.
Apollo mirrors Hermes's workflow but in the React ecosystem — same PRD, same features, built with React and Tailwind instead of Grails and Bootstrap.
WordPress Stack
The people building ReportBurster have a long, loving history with WordPress — and couldn't resist finding it a place here. The Grails and Next.js stacks may fit tighter with ReportBurster's architecture, but WordPress has its own great merits: a massive plugin ecosystem, familiar PHP workflows, and thousands of themes and extensions ready to go. For teams who already know and love WordPress, or who prefer PHP, it's a solid choice that delivers great results.
Your AI partner: Pythia — WordPress CMS Portal Advisor.
Pythia works exactly like Hermes and Apollo — same mentored pair-development workflow, same task-by-task approach — but with the WordPress stack: PHP 8, Sage theme (Roots), PODS Framework for data modeling, Tailwind CSS, and the full WordPress plugin ecosystem. She doesn't have a documentation page yet, but she's fully operational in the AI Hub.
Note: The Quick Start, Payslips, and Invoices tutorials use the WordPress stack with the Pods framework. The step-by-step guide below also covers the WordPress approach.
WordPress Portal Setup Guide
Accelerate your portal development using AI-powered tools and automation. This guide walks you through the full process of adding a new document/content type—from idea to automated publishing with ReportBurster—using real scripts, templates, and AI prompts.
Read here about Our AI Philosophy (how to build your own portal and use artificial intelligence to do it)
See sample scripts, templates, and AI prompts; get tips for best results
Fast-track your next setup
1. Plan Your Document Type
Think about the document type you need to automate and publish to the portal. Define its purpose, fields, and access rules to ensure smooth setup.
Note:
ReportBurster Portal comes bundled with three sample content types: Paystub, Payslip, and Invoice.
In this guide, you will configure a new custom content type called Statement.
Even if screenshots show Paystub, Payslip, or Invoice, always think in analogy for your own Statement type.
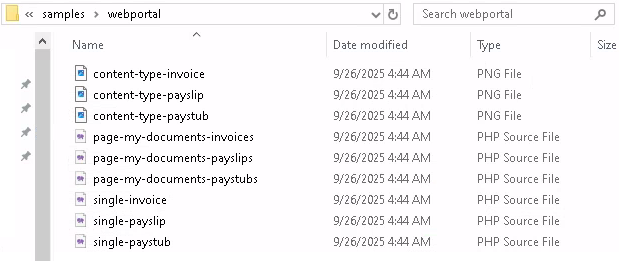
Caption: Example bundled templates for Paystub, Payslip, and Invoice.
You can use these bundled examples as guides for your own custom type.
To set up a new custom content type, you'll update two existing scripts and create one new file:
Createsingle-(new-content-type).php — displays individual documents to users.
Updatepage-my-documents.php — shows the list of documents for each user (their account page).
UpdateendExtractDocument.groovy — uploads your document data to ReportBurster2Portal.
Good news:
You don't need to write these scripts yourself (unless you want to).
AI will generate the code for you, so you can focus on building your dream portal.
2. Configure Your Content Type in Portal Admin UI
To add a new document type (e.g., Statement), use the portal admin UI.
AI is not needed here—simply configure your content type and fields as you need.
Why this step?
Every document type (like Statement, Payslip, Invoice) must be defined as a Pods "Custom Post Type" with the fields you want. This is the foundation for all portal features and automation.
How to do it:
Go to Pods Admin in your portal admin dashboard.
Click Add New to create a new Pod.
Choose Custom Post Type and fill in the name (e.g., "Statement").
Add all the fields you need (e.g., account holder, period, opening/closing balance).
Save your Pod.
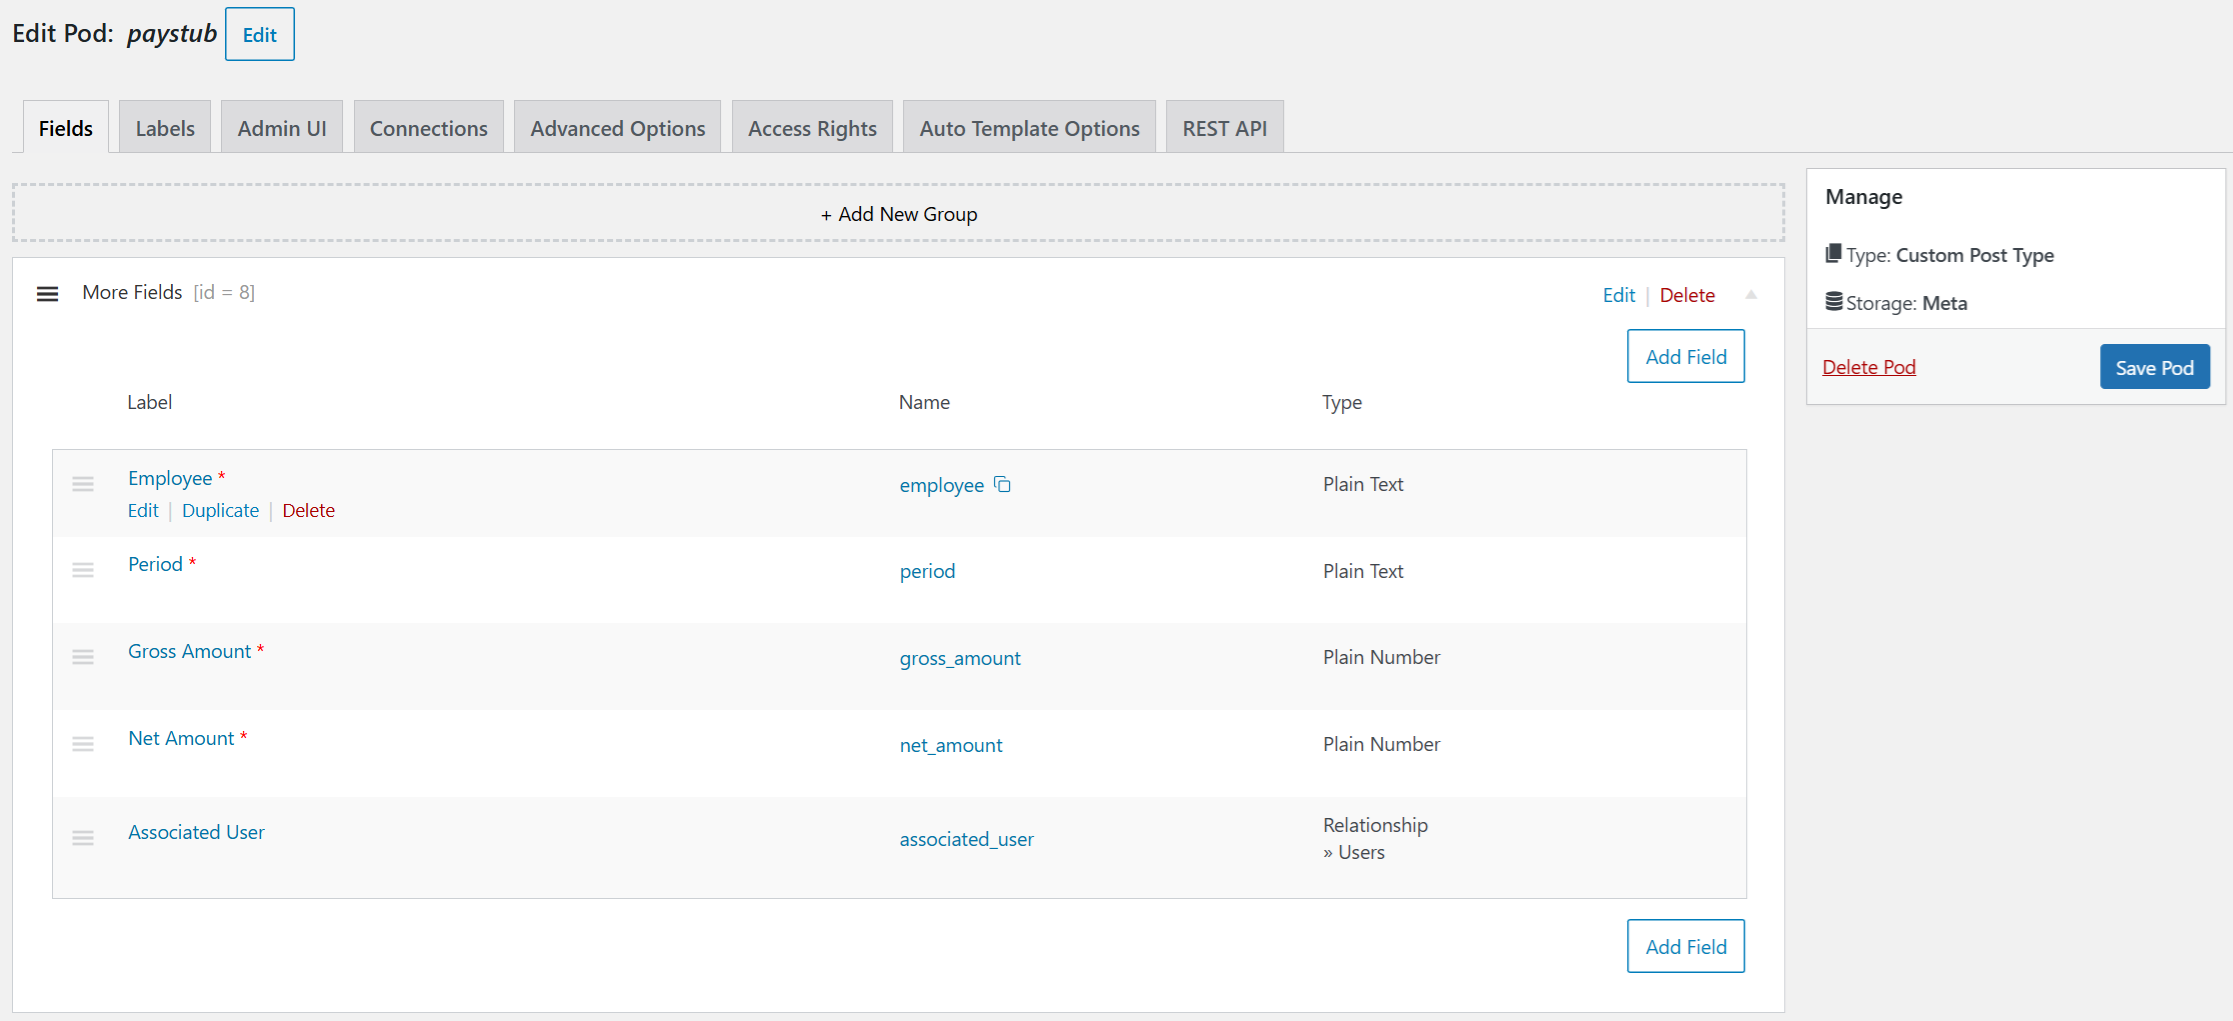
Caption: Example fields for Paystub. For Statement, define your own fields.
You can configure multiple document types—there is no limit.
Once you save, your new content type is instantly available in the portal and can be used in all further steps.
Create one or two sample records for testing the full flow end to end.
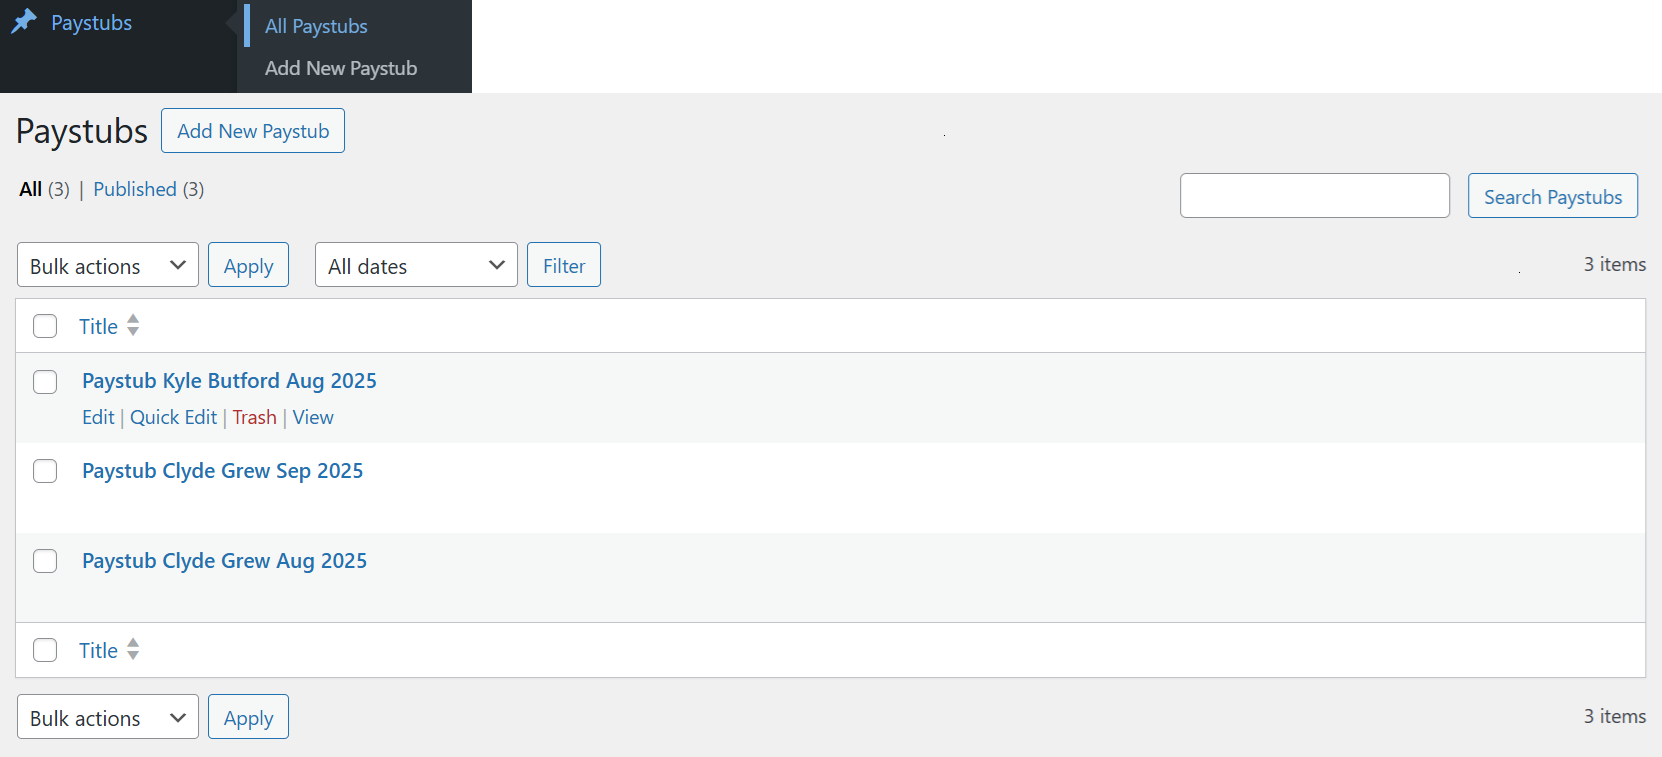
Caption: Creating sample records for testing.
3. Create or Customize Templates
Now you need to control how your documents are displayed to users.
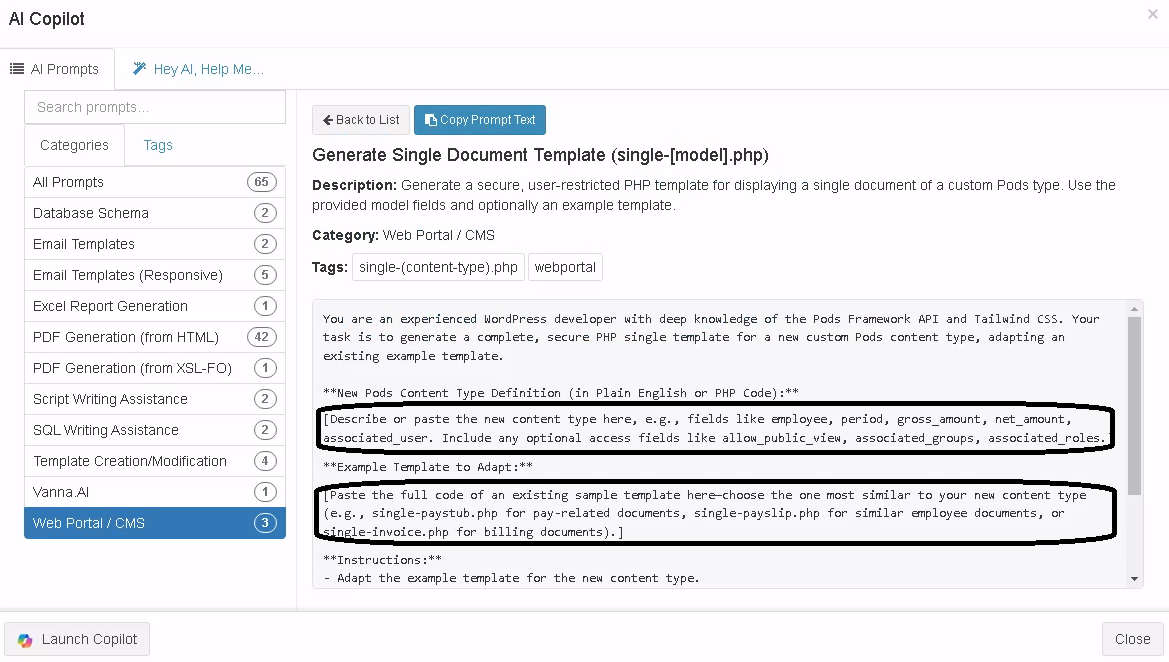
This is where AI can help you the most — by generating or adapting existing PHP templates for your new content type.
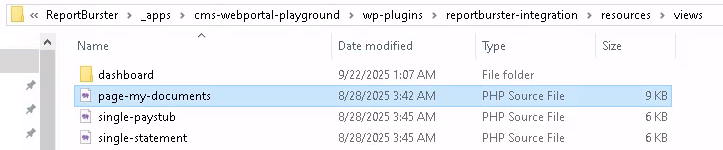
a. Single Document View
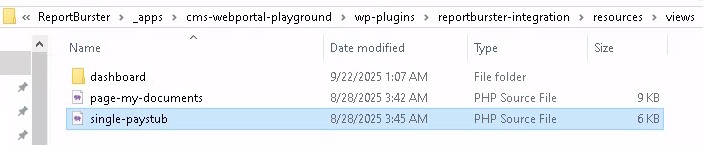
Caption: Example template files for single document view.
Copy single-paystub.php to single-statement.php.
Adjust the new template file to display your Statement fields and enforce access control.
Tip:
You don't have to write the PHP code yourself—AI can generate the script for you by adapting the existing example.
Replace the marked areas in the AI prompt with your Statement content type definition and the full content of the example script (single-paystub.php).
Give the prompt to your preferred AI chat vendor and paste the returned code into your new single-statement.php file.
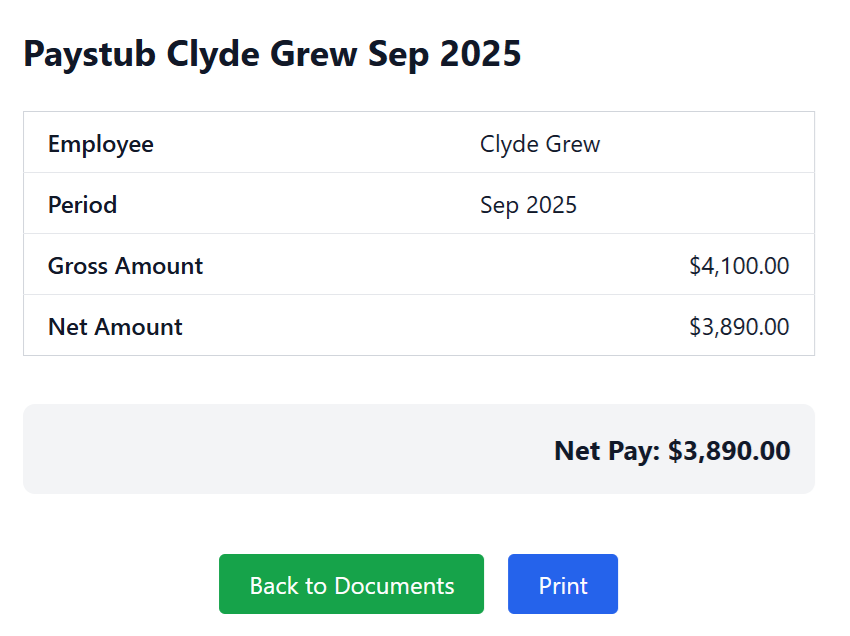
When you view a single Statement document, you'll see your custom layout (not the sample Paystub layout).
Caption: Example single document view. Your Statement will have its own layout.
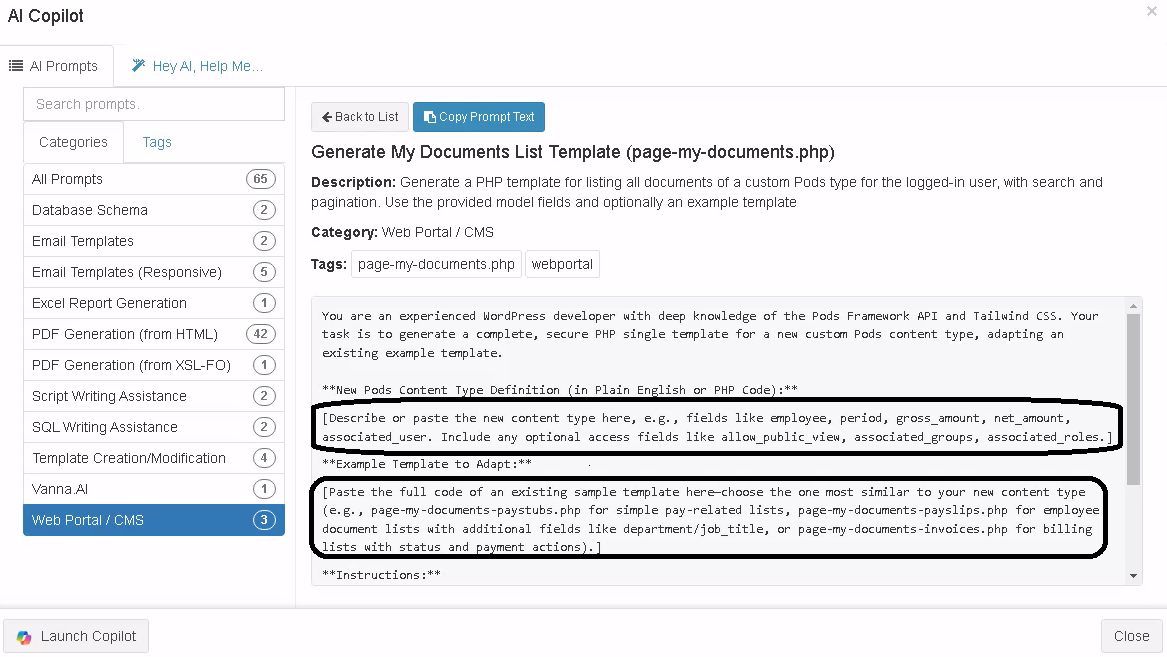
b. List View (My Documents)
Caption: Example template for listing documents.
For the list view, modify the existing page-my-documents.php to list your Statement documents for the logged-in user.
Provide your Statement content type definition and the full code of the example script (page-my-documents-paystub.php) to the AI.
Paste the returned code into your updated page-my-documents.php file.
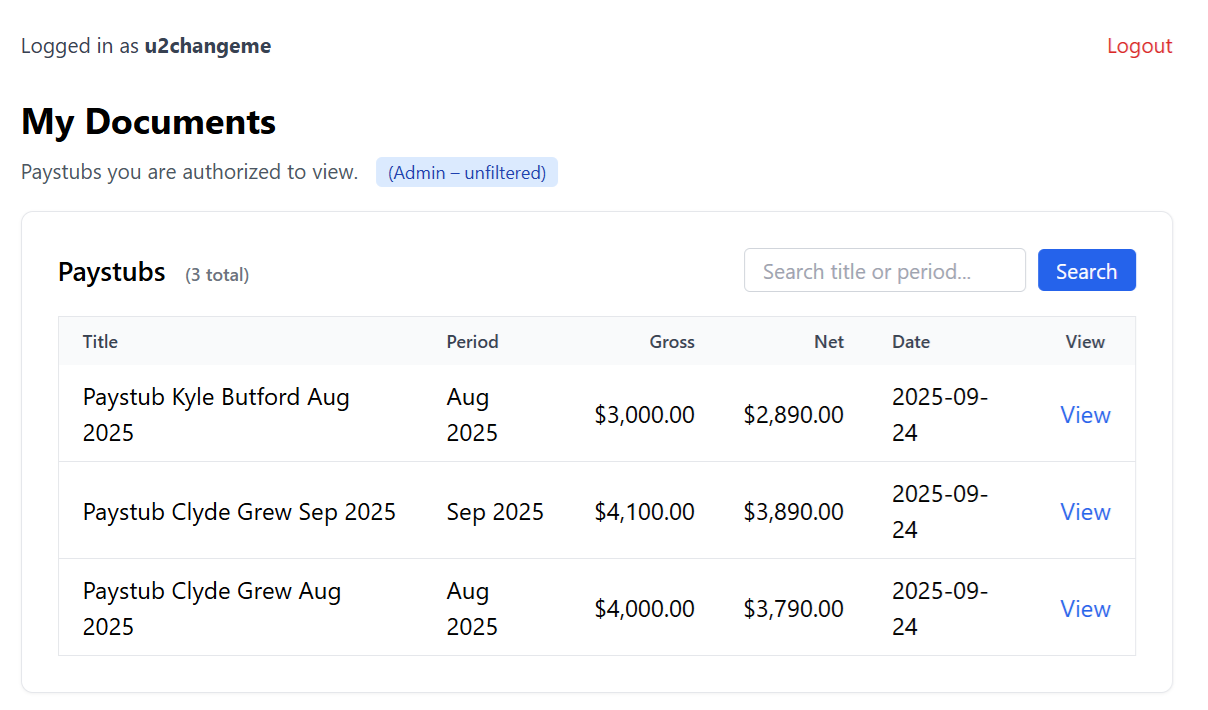
When you visit /my-documents, you'll see your custom Statement list layout.
Caption: Example list view. Your Statement will have its own layout.
4. Automate Statements Publishing with ReportBurster
Generate a Groovy script to publish documents to the portal via the API.
What the script must do:
Check if the target portal user exists (by username/email); create if missing.
Prepare document data for your content type.
Publish the document via REST API (with authentication).
Provide your Statement content type definition and the full code of the example script (curl_paystub2portal.groovy) to the AI.
Paste the returned code into your scripts/burst/endExtractDocument.groovy file.
Tip:
Guard your code with:
if (ctx.settings.getTemplateName().toLowerCase().indexOf("statements2portal") != -1) { // AI-generated code here}
so it only runs for Statement documents.
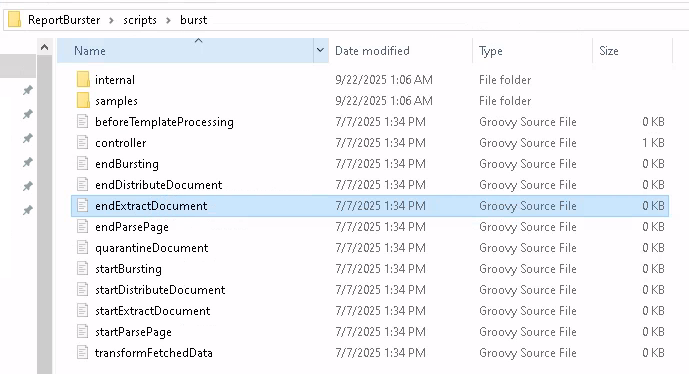
Caption: Example publishing script location.
Now, your Statement documents will be uploaded to ReportBurster2Portal automatically.
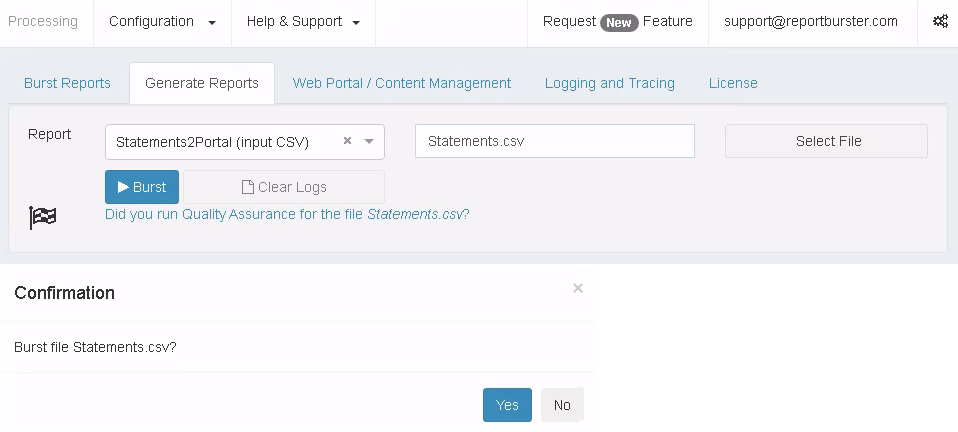
Caption: Example execution for Statement documents.
ReportBurster works with any reporting or business software, including Crystal Reports, SAP, Oracle, Microsoft Dynamics, and more.
You can generate reports and upload to ReportBurster2Portal from any datasource.
5. Test and Iterate
Log in as admin and as a regular user to verify:
Documents appear in the dashboard/list view.
Access controls work as expected.
Single document view displays all fields correctly.
Automated publishing works and users are created as needed.
6. Reference & Tips for Using AI Effectively
Reference Scripts
Single document template:
single-paystub.php
<?php/** * Generic secure single document template (works also for invoices etc.) * * Plain PHP (WordPress, Pods Framework, Tailwind CSS) * * Features: * - Requires login. * - Ownership via Pods User Relationship field: associated_user (if present). * * OPTIONAL Pods fields you may add (all boolean/relationships can be left empty): * - allow_public_view (Boolean) If true: anyone with URL can view (no auth required). * - associated_user (User Relationship) Exact WP User owner. * - associated_groups (Pick / Multi-Select) One or more WP group slugs allowed (e.g. it, hr). * - associated_roles (Pick / Multi-Select) One or more WP role slugs allowed (e.g. employee, customer). * * Logic (in order): * 1. If allow_public_view = true => bypass all other checks. * 2. Otherwise user must be logged in. * 3. If associated_user set => only that user (or admin) allowed. * 4. Else if associated_groups set => user must be in at least one matching group. * 5. Else if associated_roles set => user must have at least one matching role. * 6. Else fallback: require logged-in user (already enforced). * * You can reuse this file for other doc types by copying & renaming to single-invoice.php etc. */if ( ! defined('ABSPATH') ) { exit; }$pod = function_exists('pods') ? pods( get_post_type(), get_the_ID() ) : null;if ( ! $pod ) { wp_die('Document data unavailable.');}$doc_type = get_post_type();// --- 1. Public flag (uncomment after creating the field) ---$allow_public_view = false;/*$allow_public_view = (bool) $pod->field('allow_public_view');*/// --- 2. Require login unless public ---if ( ! $allow_public_view && ! is_user_logged_in() ) { auth_redirect(); // redirects & exits exit;}$current_user = wp_get_current_user();$is_admin = current_user_can('administrator');// Collect intended access controls (may be empty if fields not defined)$associated_user_id = 0;/*$associated_user_id = (int) $pod->field('associated_user.ID');*/$associated_groups_ids = [];/*$associated_groups_ids = (array) $pod->field('associated_groups'); // adjust depending on Pods storage*/$associated_roles = [];/*$raw_roles = $pod->field('associated_roles');$associated_roles = is_array($raw_roles) ? $raw_roles : ( $raw_roles ? [ $raw_roles ] : [] );*/// --- 3–5. Conditional enforcement (skip if public or admin) ---if ( ! $allow_public_view && ! $is_admin ) { // 3. Exact user ownership if ( $associated_user_id ) { if ( get_current_user_id() !== $associated_user_id ) { wp_die('Not authorized (owner mismatch).'); } } // 4. Group membership (placeholder – implement your own check) elseif ( $associated_groups_ids ) { /* // Example placeholder: $user_group_ids = []; // TODO: fetch groups for current user. if ( ! array_intersect( $associated_groups_ids, $user_group_ids ) ) { wp_die('Not authorized (group mismatch).'); } */ } // 5. Role-based access elseif ( $associated_roles ) { $user_roles = (array) $current_user->roles; if ( ! array_intersect( $associated_roles, $user_roles ) ) { wp_die('Not authorized (role mismatch).'); } } // 6. Else: already logged in so allowed.}// ---------------- DATA FIELDS (only those that currently exist) ----------------$employee = esc_html( (string) $pod->display('employee') );$period = esc_html( (string) $pod->display('period') );$grossAmount = number_format( (float) $pod->field('gross_amount'), 2 );$netAmount = number_format( (float) $pod->field('net_amount'), 2 );// Load theme header (includes Tailwind and other assets)get_header();?><div class="max-w-xl mx-auto bg-white font-sans text-gray-900 p-6"> <h1 class="text-2xl font-bold mb-2"><?php echo esc_html( get_the_title() ); ?></h1> <?php if ( $allow_public_view ): ?> <div class="text-xs text-gray-500 mb-4">Public document (no login required).</div> <?php endif; ?> <table class="w-full border border-gray-300 rounded-lg mt-6"> <tbody> <tr class="border-b border-gray-200"> <td class="py-2 px-4 font-medium">Employee</td> <td class="py-2 px-4"><?php echo $employee; ?></td> </tr> <tr class="border-b border-gray-200"> <td class="py-2 px-4 font-medium">Period</td> <td class="py-2 px-4"><?php echo $period; ?></td> </tr> <tr class="border-b border-gray-200"> <td class="py-2 px-4 font-medium">Gross Amount</td> <td class="py-2 px-4 text-right">$<?php echo $grossAmount; ?></td> </tr> <tr> <td class="py-2 px-4 font-medium">Net Amount</td> <td class="py-2 px-4 text-right">$<?php echo $netAmount; ?></td> </tr> </tbody> </table> <div class="mt-8 font-bold text-right bg-gray-100 p-4 rounded-lg text-lg"> Net Pay: $<?php echo $netAmount; ?> </div> <div class="mt-10 flex justify-center gap-4 print:hidden"> <?php $account_page_id = (int) get_option('reportburster_account_page_id'); $back_url = $account_page_id ? get_permalink($account_page_id) : ( get_permalink( get_page_by_path('my-documents') ) ?: home_url() ); ?> <a href="<?php echo esc_url( $back_url ); ?>" class="inline-block px-5 py-2 rounded bg-green-600 text-white hover:bg-green-700 transition"> Back to Documents </a> <a class="inline-block px-5 py-2 rounded bg-blue-600 text-white hover:bg-blue-700 transition" href="javascript:window.print();"> Print </a> </div></div><?php// Load theme footer (includes scripts and closes HTML)get_footer();?>